How to Use Boob Tape Effectively
This game-changing invention can make getting dressed way easier.

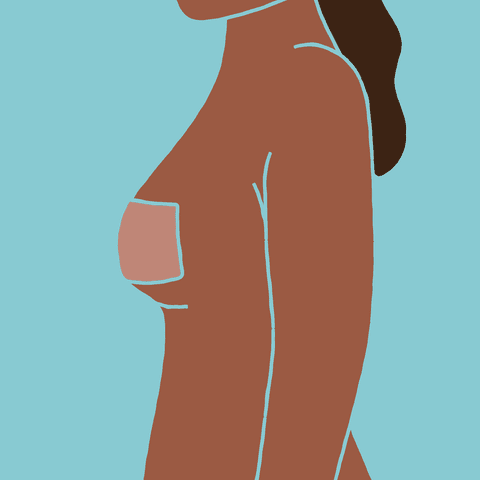
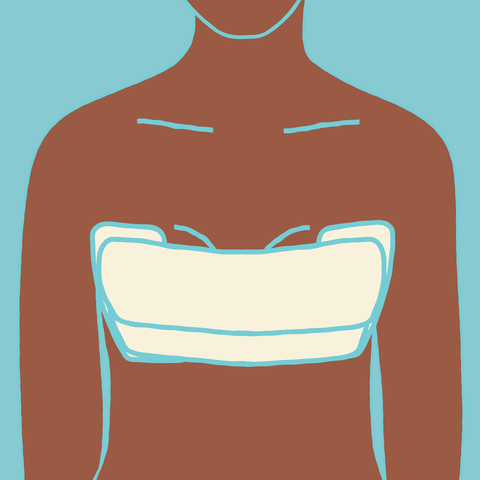
domoyega/Getty Images
A strapless bra comes in handy often, and a plunging bra can do the trick for certain garments, too. However, nothing keeps the girls in place and looking great—without detracting from your outfit—quite like boob tape.
“The whole movement started when Kim Kardashian used Duct Tape on her breasts. It worked, and then boob tape was born,” says bra expert Jene Luciani Sena, author of The Bra Book. “It’s essentially an adhesive fabric that can be used in a variety of ways to push breasts together or keep them apart.”
If you’ve yet to introduce boob tape to your world, you’re definitely missing out. This magical alternative to a traditional bra opens up a whole new portal for your wardrobe.
Related: 25 Types of Bras Every Woman Should Know, According to a Lingerie Expert
Meet Our Expert
Chellie Carlson, professional wardrobe stylist
Jessica Pfister, vice president of lingerie brand Le Mystere
What Is Boob Tape?
Boob tape is a strong, flexible fabric with a very sticky side that’s been approved for adhering to your skin safely. It sort of looks like a medicinal bandage, only it’s much more robust. The material itself is typically medical-grade, hypoallergenic, moisture-resistant, and breathable. You can even find some options that are latex-free if you have sensitive skin.
“Boob tape helps you shape and contour your breasts while holding them in place, and is typically used when a proper bra can’t be worn because the bra would show underneath the garment,” Carson explains Chellie Carlson. “It can also provide nipple coverage and help create cleavage and hold it in the exact position that you want it in underneath the garment.”
Boob tape comes in a variety of styles, including a literal roll of the adhesive tape, pre-cut strips, and adhesive “sticky bras” that cup the breast more.
When Should You Use Boob Tape?
You can use boob tape whenever and however you please. Here are a few scenarios when it comes in handy most:
When wearing deep plunging top or dress
To avoid bra lines while wearing a tight garment
While sporting a strapless or asymmetrical top
When wearing a garment with cutouts in the back or no/low back.
To provide nipple coverage in sheer garments
While wearing a garment with open sides
How to Use Boob Tape
How you apply boob tape varies slightly depending on the style. Generally speaking, though, the process is the same.
Step 1: Patch test
Grace Canaan/RS
“Place a small square on your breast tissue for a few hours a few days before your big event,” Pfister says. Check for any irritation once you remove the boob tape.
If you do have sensitive skin, Pfister recommends buying boob tape that’s made from a cotton Spandex, is medical grade, hypoallergenic, latex free, and sensitive skin-approved.
Step 2: Prepare Your Skin
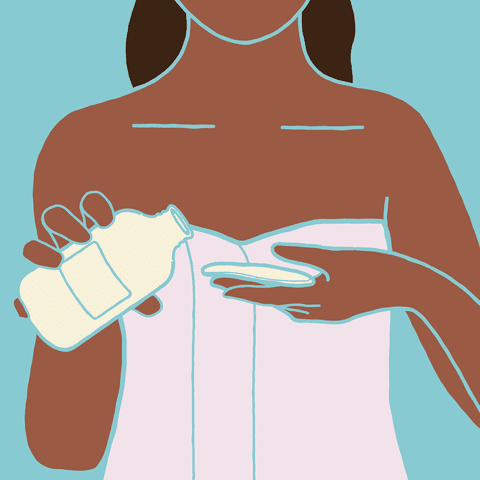
Grace Canaan/RS
Make sure your skin is clean, completely dry, and free of any oils, creams, sweat, and powders. All of these can prevent proper adhesion, which may lead to a wardrobe malfunction. If any product or residue remains, Sena says you can use a little alcohol to clean the skin well.
Step 3: Plot

Grace Canaan/RS
If you’re new to applying boob tape, Pfister strongly recommends plotting out your path. “Use a washable, light color marker or lip liner to draw the lines of the garment on your body with the garment on so you know where your tape edges should stop,” she says.
Step 4: Cut Your Tape
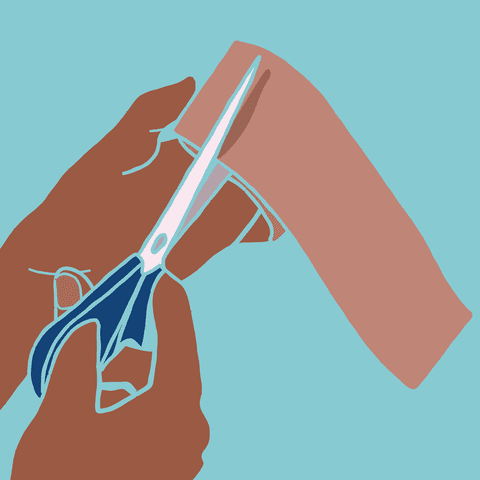
Grace Canaan/RS
As the saying goes: measure twice, cut once. “Boob tape is expensive,” says Pfister. “measure the amount that is needed for the various strips on your body using a fabric measuring tape, then cut accordingly.”
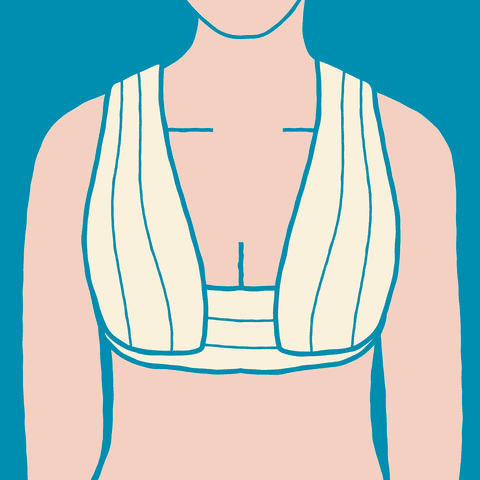
Step 5: Apply & Press

Grace Canaan/RS
Gently lay the boob tape starting from underneath your bust and pulling upward. This creates a lifting effect. Press the tape firmly and hold for a few seconds so it has time to properly adhere to your skin. (Note: Placing a nipple cover between your tape and skin is strongly advised.)
Don’t wait until the day of your event to test your taping skills. Practice the technique before your event, especially if it’s a formal or unique situation where you really need to make it count—like a wedding. Pfister says you can find lots of tutorials on social media if you need a visual.
How to Remove Boob Tape
In most cases, boob tape will last basically as long as you have it on. However, Pfister says you shouldn’t wear it longer than 10 hours just to be safe. When removing it, do so slowly and gently. It’s definitely much more comfortable to wear and remove than the OG Duct Tape trick, but can still pull at your skin.
“I recommend applying a natural oil, like coconut or jojoba, to the skin and edges of the tape and let it sit for five minutes,” says Pfister. “Then slowly peel while holding the surrounding skin taut. A steam shower before the oil application can also help to release particularly sticky tape from your body.”
How to Use Boob Tape for Different Necklines
Boob tape should be placed differently to support you as much as your neckline allows. Here's how to handle four of the most common necklines that call for boob tape.
Strapless Dresses

Grace Canaan/RS
For strapless dresses, apply a strip of tape from armpit to armpit at the base of your breasts, then lean forward and add more strips as needed to support your breasts. Run a piece starting at the top of one breast, and beneath each breast to the top of the other breast.
Plunging Necklines
Grace Canaan/RS
Add pieces of boob tape vertically, starting beneath the breast and extending onto or over the shoulder if the neckline allows for it. Add more vertical strips to support your breasts. You can add supportive horizontal tape beneath your breasts if the neckline allows for it.
Backless Dresses
Grace Canaan/RS
Start the tape underneath each breast and bring it over the breast vertically, adjusting as needed for support, and ensuring the tape doesn't go above the front of the neckline.
Add more pieces horizontally as needed to provide support, making sure that the tape doesn't extend beyond the edge of the dress.
Halter Dresses

Grace Canaan/RS
Apply tape vertically, from under the breast toward your shoulders, stopping where needed to avoid having the tape show. Add as many strips as needed to support your breasts.
Can All Breast Sizes Wear Boob Tape?
You’ll find a wide range of boob tape brands with various sizes, features, and prices. Most products will work for small to medium sized breasts without any issue.
If you have a larger bust, the right boob tape can be a miracle worker and support your breasts, but you’ll likely need to use more tape and a bit more strategy to get the job done. Pfister recommends looking for boob tape that’s at least four-inches wide so you can get better coverage and support.
This can still be a bit risky since the weight of your breast can loosen the tape as it wears, potentially causing it to unstick. To avoid the frustration, Carlson says you might just be better off choosing a dress that allows for a bra that provides the support you need. “In my experience, my clients feel more confident with the comfort and support of a real bra, especially those with larger breasts.”
For more Real Simple news, make sure to sign up for our newsletter!
Read the original article on Real Simple.

