Brown Butter And Chile-Stuffed Chocolate Bars Recipe

Brown butter-chile chocolate bars aren't something you can find in every supermarket or convenience store, but this DIY recipe is a great chance to try them out. Developer Tanika Douglas describes these candies as having "beautiful complexity in texture and flavor, with a hint of spice elevating the rich chocolate and buttery caramel." Chocolate and chile are already a beloved pair in a variety of contexts, and the inclusion of brown butter adds nuttiness to the sweet-savory duo. Douglas also notes that the candies offer plenty of textural contrast, too, with the soft, chewy caramel, smooth chocolate coating, and crunchy salt topping.
Douglas says, "I prefer the contrast from the rich dark chocolate," although she notes that with 90% cacao chocolate, you'd get "a bitter note which would work well with the sweet caramel." If you're not into bitter flavors, you could always opt for a 50% to 60% bar or even use milk or white chocolate, instead.
Read more: Trader Joe's Frozen Desserts Ranked Worst To Best
Collect The Ingredients For The Brown Butter And Chile-Stuffed Chocolate Bars
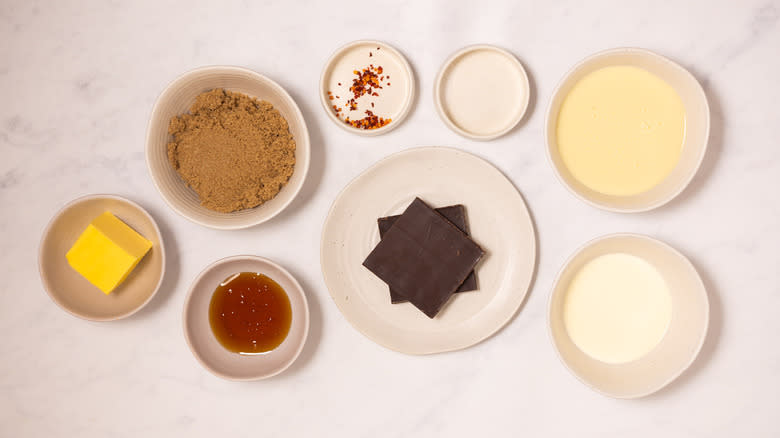
Douglas makes these bars with unsalted butter, sweetened condensed milk, heavy cream, brown sugar, crushed red pepper, dark chocolate, salt flakes, and golden syrup. If you're not familiar with the last ingredient, popular in the U.K., that's okay -- Douglas says that corn syrup or honey would be great alternatives for U.S. cooks. In fact, she assures us, "I've tested the recipe with honey, and the result is equally delicious."
Step 1: Put The Butter In A Pot

Place a medium-sized pot over medium heat, then add the butter.
Step 2: Brown The Butter

Cook the butter for 5 minutes, stirring intermittently, until nutty and dark brown in color.
Step 3: Stir In The Next 5 Ingredients

Add the condensed milk, cream, brown sugar, golden syrup, and chile flakes, and bring to a boil.
Step 4: Cook The Caramel
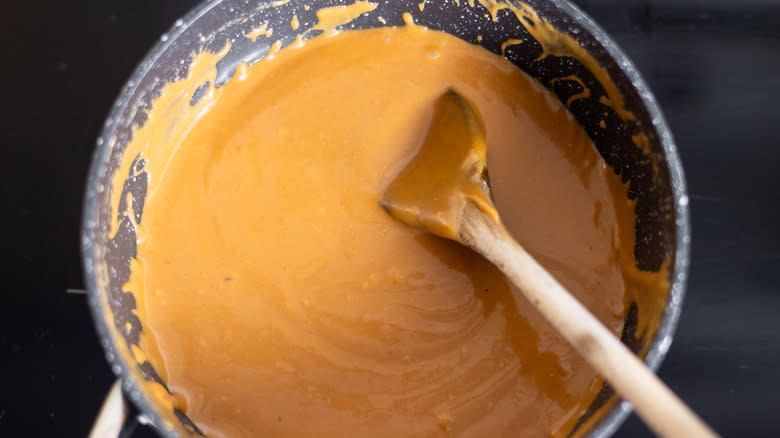
Turn down to a simmer and cook, stirring constantly, until the mixture reaches 245 F on a candy thermometer.
Step 5: Mold And Chill The Caramel Bars
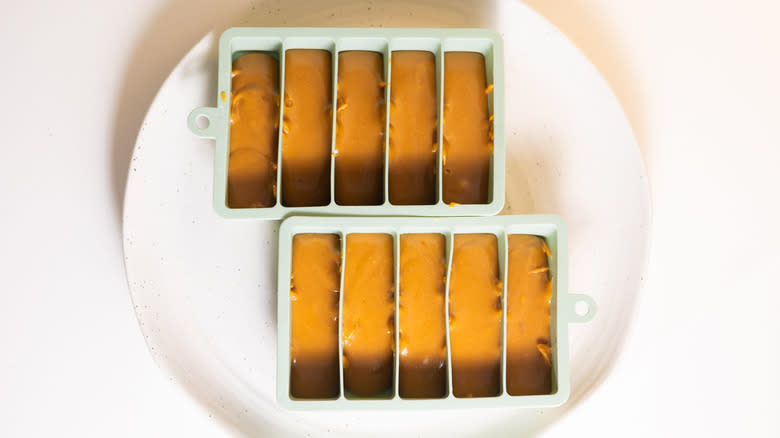
Spoon the mixture into 16 small, rectangular silicone bar molds measuring 1x3 inches. Refrigerate for 2 hours, or until set.
Step 6: Melt The Chocolate
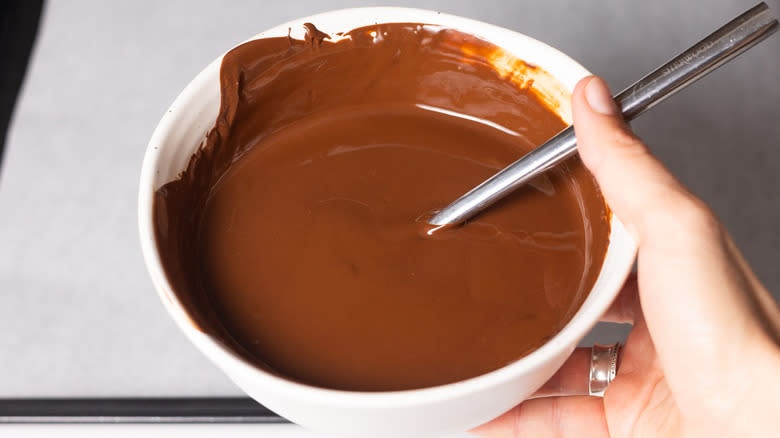
Place the dark chocolate into a heatproof bowl and melt in the microwave in 20-second intervals, stirring intermittently, until melted.
Step 7: Coat The Caramel With Chocolate
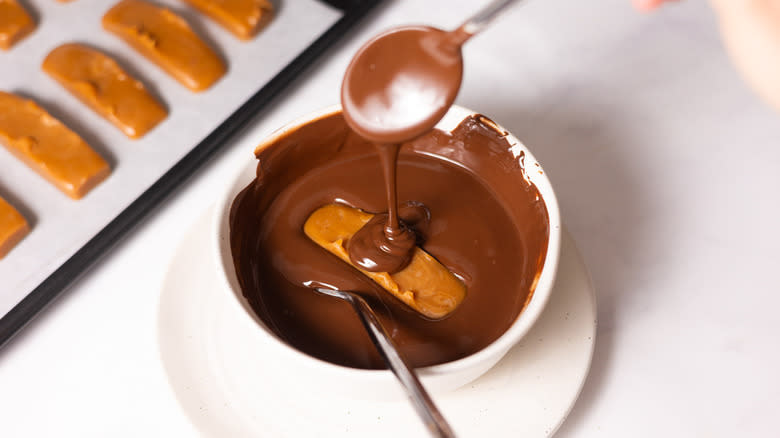
Dip each caramel bar into the melted chocolate, then place onto a lined tray.
Step 8: Salt The Candy
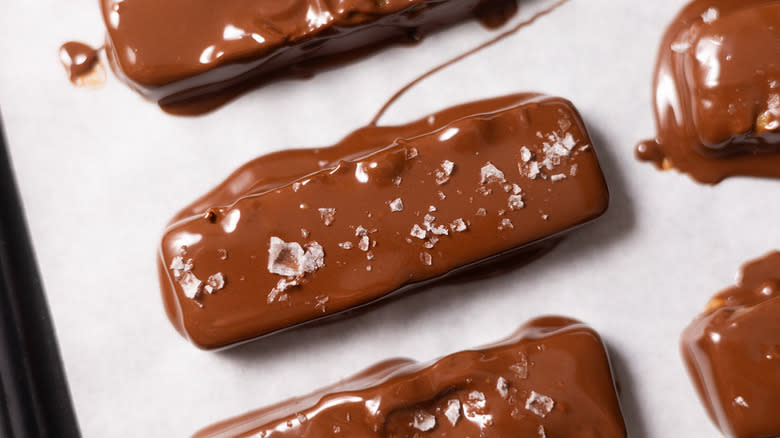
Sprinkle the salt flakes over the chocolate bars.
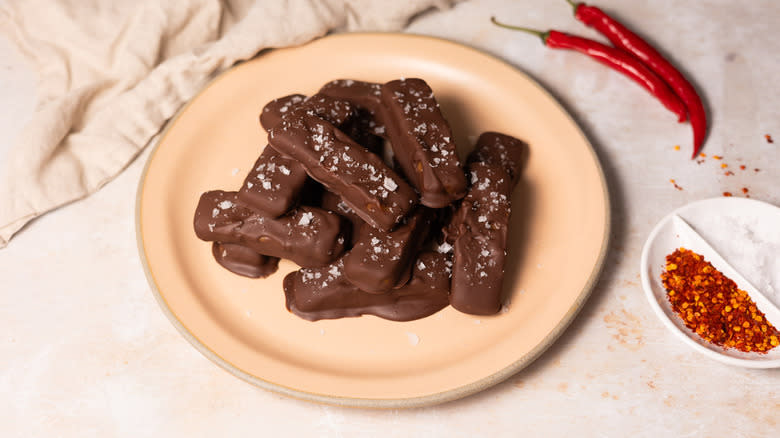
Step 9: Chill The Candy

Place the chocolate bars back into the fridge to harden for 20 minutes, then place onto a serving plate and enjoy.
Brown Butter And Chile-Stuffed Chocolate Bars Recipe

What Is The Best Way To Store Homemade Chocolate Bars?
As these candy bars are chocolate-coated and chocolate tends to be a bit melty, Douglas says that it's best to keep them in the refrigerator. That way, she says, "The caramel stays nice and chewy and the chocolate stays solid." If you like a softer candy, you can leave the candy bars out at room temperature, although if you do, Douglas says it's best to cover them in plastic wrap and keep them away from any sunny windows. You could also store the candy in the freezer if you enjoy the cold crunch of frozen chocolate bars.
If you're thinking that these chocolate bars would make a great gift, you're not wrong there, but if you need to mail them to the prospective giftee, you should wait to do so during the colder months of the year where you both live. (If you're in different hemispheres, you should probably stick to sending non-perishable gifts). Pack the chocolate straight from the fridge or freezer, and be sure to stick a few cold packs into the box.
How Can You Measure The Temperature Of Caramel Without A Thermometer?

If you're going to be making a lot of candy, it's a mistake not to invest a few bucks in a candy thermometer. If you have a deep-fry thermometer on hand, this will work, since they're essentially the same thing and both read up to 400 F. Don't try using a meat thermometer, however, as these tend to top out around 220 F and the caramel filling for these candies needs to reach 245 F. If you're making this recipe in the spur of the moment, though, you can definitely make them without a thermometer, although Douglas adds the caveat that practice may be needed in order to "read" the candy correctly.
The main method for candy making sans thermometer requires dropping some of the syrup (Douglas says to use about ½ teaspoon) into a glass of water and checking to see what it does. If it forms a thread, it's at no more than 235 F, so it needs to be cooked more. If it forms a soft, squishy ball, it's between 235 and 240 F, which is fine for fudge but not quite ready for caramel. If the ball is "firm but you can be slightly flattened with your fingers," Douglas says, then it should be around 245 F, so it's time to turn off the heat.
Read the original article on Mashed.

