Everything You Need to Know About Gel Extensions
They're an easy way to fake longer nails.

Getty Images
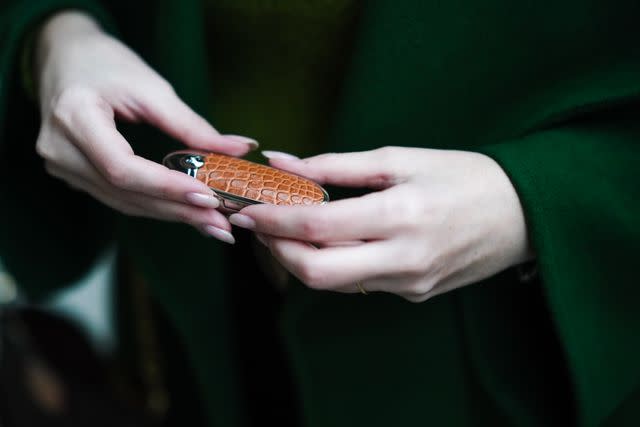
Beautiful nails come in all shapes and sizes but there’s no denying that long, tailored tips are particularly head-turning. In addition to offering more space to achieve trendy nail art, long nails elongate the fingers for a more elegant hand appearance overall. But what if, no matter how hard you try, you simply can’t grow long nails? While your first instinct might be to consider acrylic nail enhancements, we’re here to turn you on to gel extensions.
“Gel extensions are any extensions made on natural nails using soft or hard gel,” says Aprés Nail brand director, Eunice Park. “Aprés Nail revolutionized gel extensions by creating Gel-X, a 100 percent full coverage, soft gel extension system that offers the length, structure, and shape all in one tip.”
Meet Our Expert
Eunice Park is the brand director at Aprés Nail.
Mazz Hanna is a manicurist, and the CEO of Nailing Hollywood.
Sounds like a dream, no? Keep reading to learn everything there is to know about gel extensions.
How Gel Extensions Work
Gel extensions can be crafted in one of two ways. “Gel extensions are artificial nail enhancements made using either pre-shaped full coverage gel tips and gel that is cured onto the natural nail to add length and strength or they can be hand-sculpted using forms and a builder gel,” says manicurist and Nailing Hollywood CEO Mazz Hanna.
Aprés Gel-X is the most convenient of these two methods. “Gel-X allows you to create faster, easier, and more durable gel extensions than previous methods,” Park says. “This soft gel, full coverage tip is applied using our signature soft gel formula of Extend Gel ($23) to adhere the Gel-X Tip ($30 for 600) onto the natural nail.” Best of all, the Aprés Gel-X Nail Extension Kit ($117) includes a file, buffer, tips, curing light, and bottles of bonder, extend gel, and non-wipe top coat, so you have everything you need for a salon-quality enhanced manicure at home, without having to scour the web to source it all.
Logistically, gel extensions work a lot like gel manicures as both use a lamp for curing. But in addition to adding length, gel extensions also offer more strength and durability than a regular gel manicure, Hanna notes.
The Benefits of Gel Extensions
Getty Images
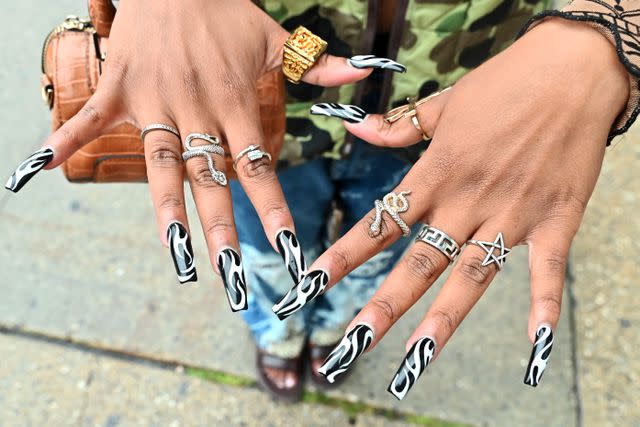
The reason gel extensions are trending on social media and in the nail world is because of how gentle they are in comparison to other nail enhancements.
“Because Gel-X is made out of soft gel, there are many benefits," says Park. For example, preparing the nail for gel extensions is less abrasive than the prep for other extensions. Plus, it's much easier to soak off.
How to Achieve Gel Extensions at Home
Gel extensions are easier to apply than acrylic however, they still require ample skill. “The process involves a series of steps that requires a lot of expertise, so I recommend seeing a trained professional for both Gel-X and builder gel,” Hanna says.
If, however, you want to try to achieve the look at home, Hanna reveals her step-by-step process for applying both Gel-X tips and builder gel extensions. Read through her instructions, below.
Gel-X Tips
Gel-X Tips are lightweight and easy to tailor. “The Gel-X Tips are quite moldable due to the soft gel content so you can shape and customize the tip to fit each nail,” Park explains.
“If you want to attempt Gel-X at home, do your research before attempting,” says Hanna. “Make sure you use tips that are the proper size for each nail, be careful to not get any gel on your skin, and be careful to not have any bubbles in your adhesive application since this can lead to moisture getting trapped underneath your gel extensions.”
More specifically, she says to follow the step-by-step instructions below.
Prep your natural nails as you would for a gel manicure. Push back your cuticles, buff your nails, and trim/shape your nails as needed. Clean the nail plate and use a nail dehydrator and primer to enhance the adhesion of the gel tips.
Choose the right size tips for each nail, ensuring that there is perfect coverage from sidewall to sidewall. If necessary, file the edges of the tips for a perfect fit.
Apply a thin layer of gel adhesive to the natural nail. Then cure for the recommended time.
Apply a thin layer of gel adhesive to the underside of the Gel-X tip. Then carefully place the tip onto the natural nail starting from the cuticle area and pressing down to the free edge to avoid bubbles. Hold the tip in place and quickly cure it under the lamp for a few seconds.
Fully cure your nails. Once all of the tips are applied, cure all of the nails under the lamp for the recommended time to ensure the gel is fully cured.
Add polish. If desired, apply gel polish in thin layers, curing for the recommended time between coats. Finish the look off with top coat.
Builder Gel Extensions
Where Gel-X tips are pre-shaped and formed, builder gel extensions have to be sculpted by hand. “Hand-sculpted gel extensions are achieved using forms—either paper or plastic forms,” Hanna says. “The paper forms are placed on your fingertips under your natural nail and create a base for sculpting; plastic forms are placed on top of the nail and then get taken off once the gel is cured.” Be mindful though: The sculpture process requires the utmost precision and care. “Properly sculpting your nails is crucial to avoid damaging your natural nails,” Hanna says. “Given the precision and expertise required, I highly recommend seeking a trained professional for this nail enhancement.”
That said, if you have faith in your abilities and love a good DIY, she shares her step-by-step process for builder gel extensions, below.
Prep your natural nails as you would for a gel manicure. Push back your cuticles, buff your nails, and trim/shape your nails as needed. Clean the nail plate and use a nail dehydrator and primer to enhance the adhesion of the gel.
Select the appropriate nail forms for each finger. Ensure the forms fit snugly and securely beneath the free edge of your natural nails. Adhere the forms to the nails, ensuring they align correctly with the natural nail's shape and desired extension length.
Apply a thin layer of builder gel to the natural nail, extending slightly onto the form. Cure under a UV/LED lamp for the recommended time.
Apply a bead of builder gel to the natural nail and form. Use a brush to shape the gel, building up the desired length and balancing the apex of your nail. Ensure the gel is evenly distributed and smooth. Cure under the lamp for the recommended time. It may take a few layers to get your apex properly balanced. Use a nail file to smooth out any bumps and ridges between coats.
Once the final layer is cured, carefully remove the forms from each nail. Then file and shape the gel extensions to refine the length and shape. Use a buffing block to smooth the surface of the extensions.
Add polish. If desired, apply gel polish in thin layers, curing for the recommended time between coats. Finish the look off with top coat.
What the Pros Recommend
Getty Images
Thanks to their gentle nature, easy care, and beautiful appearance, gel extensions are a top recommendation amongst pros. “They are a great option for those who want some extra length and struggle with growing out their natural nails,” Hanna says.
As for which type you should opt for, it’s a matter of personal preference.
“Gel-X will give you the most consistent and durable results for gel extensions,” Park says. “It’s also faster than other methods such as hard gel or builder gel that use forms. Gel-X really is the best way to give yourself great nails in half the time but with better results.”
Meanwhile, Hanna prefers sculpted gel extensions since they’re fully customized. “I would opt for sculpted gel extensions given that they are tailored to your natural nail bed and a skilled professional will give you a beautiful, balanced set that will last upwards to four weeks, she explains.
In either event, gel extensions require skill. If you feel unsure of your DIY abilities, Hanna recommends heading to the salon for gel extensions to avoid potentially damaging your natural nails in the process.
For more InStyle news, make sure to sign up for our newsletter!
Read the original article on InStyle.

