How to Know When It's Time to Repot an Orchid
"Hearst Magazines and Yahoo may earn commission or revenue on some items through these links."
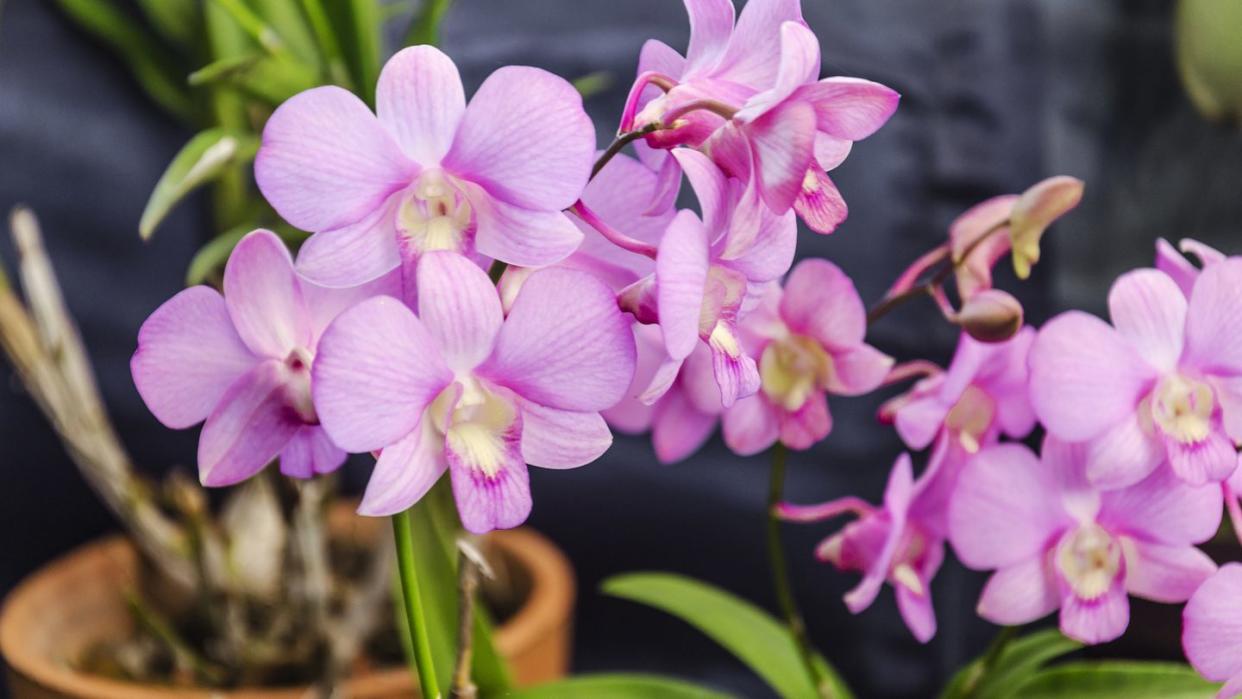
Potted orchids have long been popular with plant enthusiasts for their elegant appearance and range of beautiful colors. These once-rare botanicals were prized by aristocrats in the Victorian era and came to be associated with wealth and luxury. Now that they’re routinely cultivated in hothouses, orchids are much more accessible. They’re popular houseplants because their lovely blooms last much longer than cut flowers. Though they look delicate, orchids are known for their resilience if given proper care.
One essential aspect of orchid care that’s often overlooked is repotting. To shed light on this critical task, Mollie Tarte, a floral designer and indoor plant buyer for Swanson’s Nursery in Seattle, Washington, shares her tips for when, why, and how to repot an orchid to promote its health and longevity.
Signs to Repot Your Orchid
According to Tarte, these telltale signs indicate that your orchid is ready to be transplanted to roomier accommodations:
Visible Roots: If you spot roots emerging from the bottom of the pot or meandering along the surface, it's a clear indication that your orchid has outgrown its current planter.
Aerial Roots: If you see excessive aerial roots sprouting from the top of the plant, it’s a signal that it’s time to repot. What’s considered excessive? “More than a few or ones that have grown very long,” says Tarte.
Time Since Last Repotting: “For orchids potted in bark or bark-based mixes, you should repot if two or more years have passed since the last repotting,” says Tarte. Conversely, orchids potted in moss should be repotted annually to prevent issues like root rot.
What You Need to Repot an Orchid
Before you figure out how to transplant an orchid, Tarte recommends that you gather the following necessities:
New Potting Medium: Select a fresh potting mix that's suitable for orchids. Most orchids grown as houseplants are moth orchids, belonging to the Phalaenopsis genus. “These orchids are long-blooming, forgiving, and can thrive in many different potting mediums,” says Tarte. Tarte’s favorite mix is four parts bark, one part sphagnum moss, and one part perlite. “However, there are many mediums that can work well for Phalaenopsis—just be sure to avoid regular potting soil.”
New Pot: Choose a pot with adequate drainage that is one to two inches larger in diameter than the root mass of your orchid. Usually, that means your new pot should be one to two inches larger than the original pot. However, says Tarte, “If a plant has suffered root rot and its healthy root mass has declined, we recommend repotting back into the same size container. For healthy plants that you simply don’t want to put in a larger pot for space concerns, you can root prune the plant, removing the outer 10 to 20 percent of roots and repotting it into the same size container. If you are reusing the same pot, be sure to clean it thoroughly with soap and water to remove any harmful microbes and salt buildup.”
Sterilized Clippers or Scissors: Keep your cutting tools sharp and sterilized with rubbing alcohol to prevent the spread of diseases.
How Do You Repot an Orchid?
Here, Tarte outlines the steps for how to transplant an orchid with confidence:
Prepare Potting Medium: Begin by soaking the new potting medium for several hours or overnight to ensure it's thoroughly saturated.
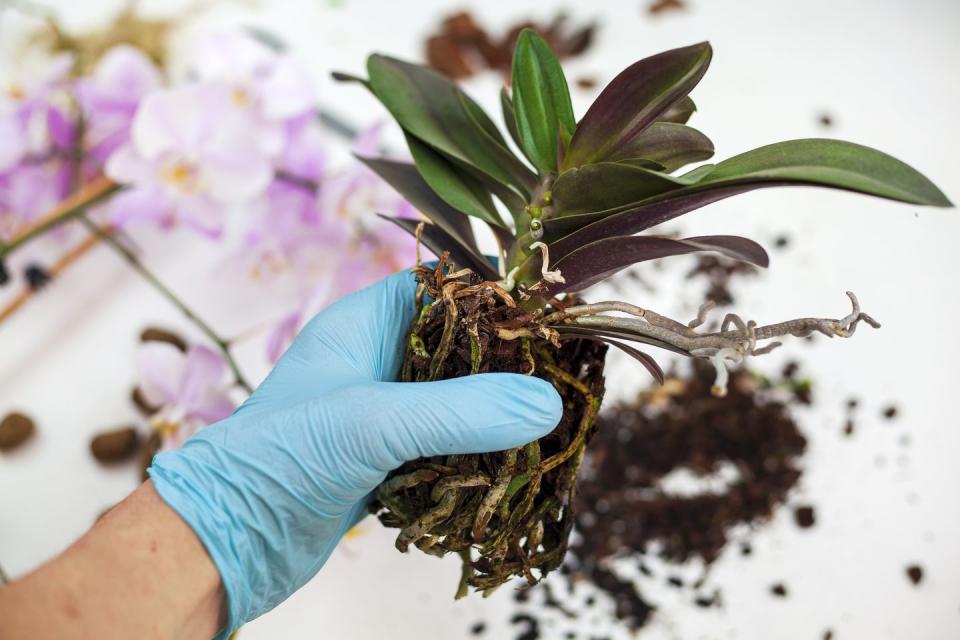
Extract Orchid From Old Container: Gently remove the orchid from its current pot, using a serrated knife if necessary to loosen bound roots. “Very tightly bound roots that have grown together to mirror the exact shape of the old pot may need to be cut to loosen the bind,” says Tarte. “In this case, you can cut one to three zipper-like incisions up the side of the root mass, and then parse apart the roots with a gentle massage.”
Clean Roots and Remove Old Medium: Massage the root mass to remove the old potting medium, trimming away any damaged or rotting roots with sterilized clippers. “Once you are done with this step, your root mass should appear loose and rather squid-like,” says Tarte.
Potting the Orchid: Layer the bottom of the new pot with a thin bed of fresh potting medium. Position the orchid's root mass in the center of the pot, and carefully surround it with the new medium, adding structure around the roots so that they are evenly distributed with minimal crowding or gaps.
Settle and Water: Thoroughly water the repotted orchid to help settle the new medium, topping it off if needed to ensure proper hydration.
How to Repot Different Types of Orchids
Orchids are one of the largest plant families in the world, including almost 30,000 species and many thousands more hybrids and cultivars, according to Tarte. As aforementioned, Phalaenopsis species can thrive in many different potting mediums and are known for being long-blooming and forgiving.
“If you have an orchid that is not a Phalaenopsis species, further research should be done to determine the type of potting medium you should use. The first step is to identify if your orchid is epiphytic (i.e., lives in the crevices of trees or other larger plants) or terrestrial (lives in soil). Epiphytic types will need a chunkier, bark-based potting mix, whereas terrestrial species may be grown in more soil-based potting mixes.”
Best Time of Year to Repot an Orchid
Tarte recommends knowing how to repot an orchid in the spring and summer when plants are growing most actively. However, orchids can be repotted year-round. It is not recommended to repot orchids when they are in bloom, as this can cause flowers or buds to drop prematurely.
To maintain optimal health, Tarte recommends repotting most orchids every two years. “This is because potting mediums will break down over time, which can lead to issues like root rot. While orchids can usually survive in the same potting medium for much longer, they will rarely thrive,” she says. In addition, “Plants potted in primarily bark can go longer without being repotted, as this medium breaks down more slowly. Plants potted primarily in moss must be repotted more frequently as it breaks down faster.”
Caring for Your Orchid Post-Repotting
After repotting, diligent care is paramount to ensure your orchid thrives. Tarte offers these tips to help your repotted orchid thrive.
Keep a close eye on the soil moisture and be sure to water as soon as the medium becomes somewhat dry. Never allow the mix to become bone-dry, and never allow the soil to stay soggy.
Good drainage and air circulation are key. “My favorite way to pot orchids is using the cache pot method, which is just a plastic liner pot that sits inside a more decorative pot. Be sure that the liner pot does not fit too tightly into the outer decorative pot, as this can limit air circulation. I like to choose a decorative pot that is at least one inch larger in diameter than the liner pot. To water, remove the liner pot from the decorative pot and water over the sink,” says Tarte.
Orchids like bright light but need to be protected from hot sun. A north- or east-facing window is ideal, but sunnier windows work too, as long as they’re behind transparent curtains.
Keep your plant warm. “Phals love warm temperatures, ideally 70 to 80 degrees during the day, 65 degrees at night,” says Tarte. “Keep away from cold drafts or forced air heating vents.”
Fertilize regularly with an orchid-specific fertilizer at a diluted strength. A common recommendation for orchids is to fertilize weekly and weakly.
Follow House Beautiful on Instagram and TikTok.
You Might Also Like

