A Renter Turned a “Dusty” WFH Corner into Her Dream DIY Breakfast Nook
While preparing to host a holiday dinner party for friends in her Astoria, Queens, apartment, Madeline Scalzi had an idea. The content creator behind the Instagram account Tulips for the Table decided she would use the six days leading up to the gathering to build an expansive bench for a corner nook in her home that she had always envisioned using as a dining space.
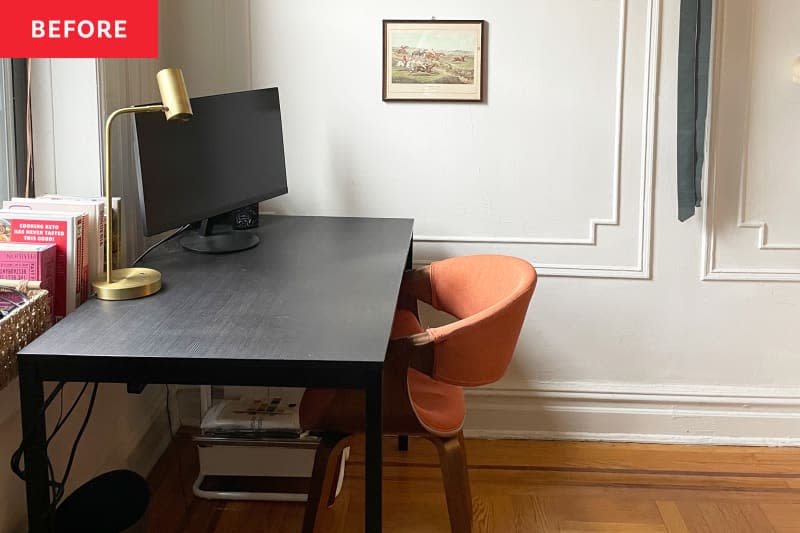
“It just makes sense,” Scalzi says, noting that a radiator occupied the area, which was also home to a WFH desk that was “collecting dust and papers” and largely “unused” post-COVID. “It has the best sunlight all year round, and it is adjacent to the kitchen area.” For all of these reasons, this location seemed like the perfect space for an L-shaped dining banquette, which she’d build from two separate units, an L-shaped storage bench and a radiator cover, to look like one big piece. The only problem? Time wasn’t on her side.
“Typically, for a project like this, I would allocate at least two weeks for completion, so I knew I would be cutting it close,” says Scalzi. “It really did come down to the wire!”
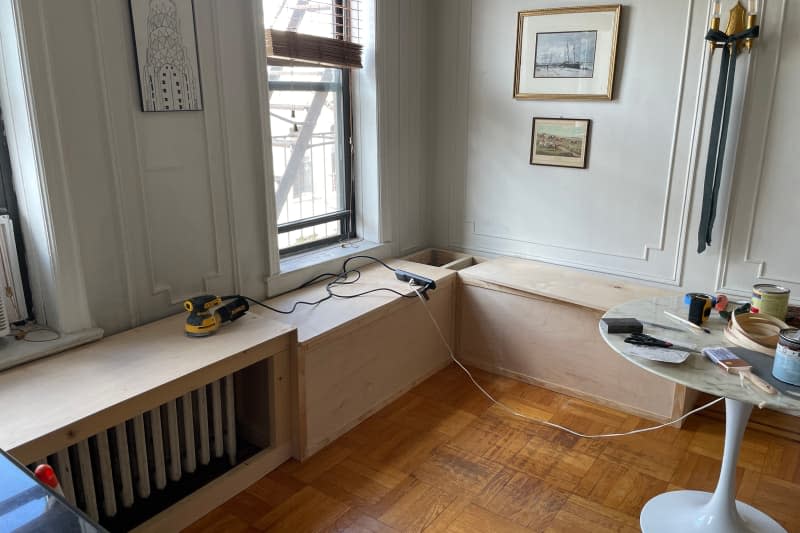
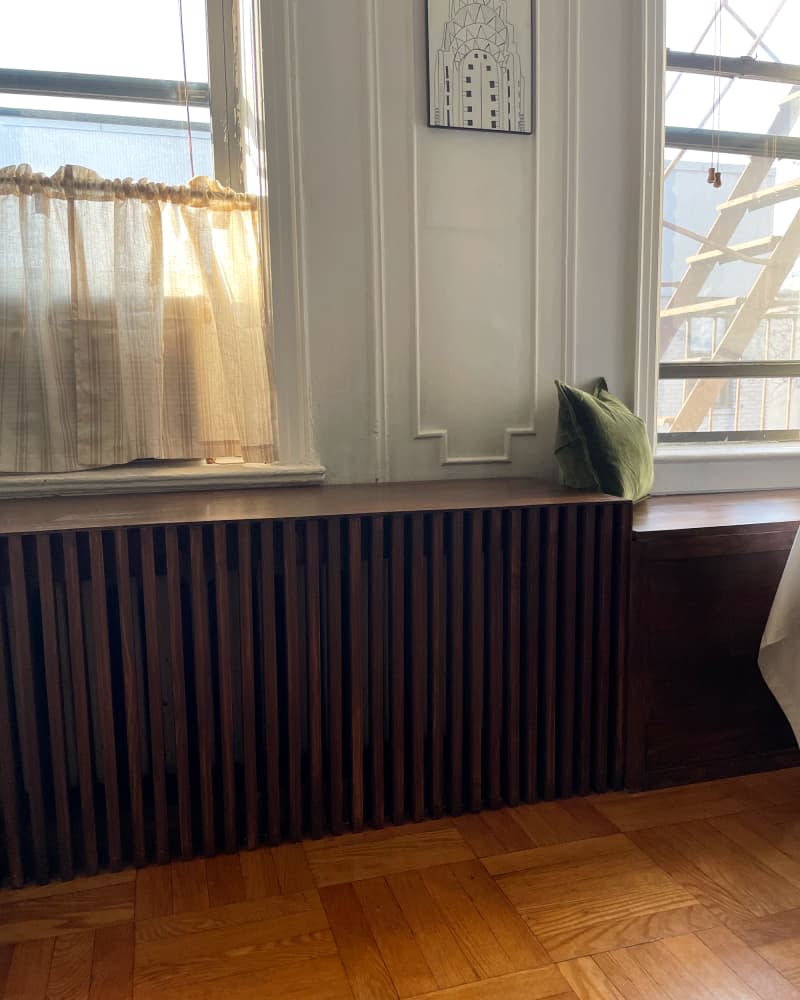
To kick off the bench building process, Scalzi searched the internet for inspiration before deciding on a final look. The piece itself is made out of an L-shaped Shaker-style wood-frame box, which Scalzi paired with a rectangular fluted wood radiator cover to create one continuous piece. “I love the fluted detail of the radiator cover because it is a little bit more modern than what I would usually go for, which makes it look more interesting than a standard, store-bought cover,” she says.
Before beginning the building process, Scalzi turned to Pinterest, YouTube, and Google to craft her plan. “This part required measuring the space a number of times to make sure the pieces were going to fit together as expected,” she says. “I drew out the plan; measured it again; and then, using painters tape, I taped the approximate size of the bench out on the walls and floor.” Scalzi also made sure the height of her bench would stand between 18 and 23 inches, which is typical of seating for dining.
After making sketches, Scalzi calculated how much wood she would need for the seat and frame. She then researched what cuts would need to be made, which she says was the hardest part of the project. The next step, after making those cuts was building the frame of both the bench and the radiator cover with 2-by-4s and both L and T brackets for support. After building the frame, Scalzi cut the face, side, and top panels to size and attached them with a nail gun. For the sides of both units and the top of the radiator cover, she used sanded plywood that was 5 millimeters thick, and for the top of the bench, she used 1/4-inch sanded maple plywood. “I also used a jigsaw and a multi-tool to cut a hole in the bench where it will sit against the wall outlet,” Scalzi explains.
Once the box-like shells of the bench and radiator cover were complete, Scalzi cut and sanded pine lattice molding to fit the face of the bench for a clean, trimmed edge and fastened it with wood glue and brad nails. She then cut a piece of molding and added it over the seam between the radiator cover and the bench to camouflage it, making the two separate pieces appear as one (though the radiator cover is taller, so there is a small difference in the two pieces’ height). Then, she filled the exposed nail holes with stainable wood filler and sanded the whole piece down with a 220-grit sanding block.
“I also added wood veneer edge banding to the lid of the bench to give it a more finished look and used piano hinges to connect the lids to the top of the bench,” she shares. That way, she’d be able to use the inner compartments of the bench part of the banquette for storage.
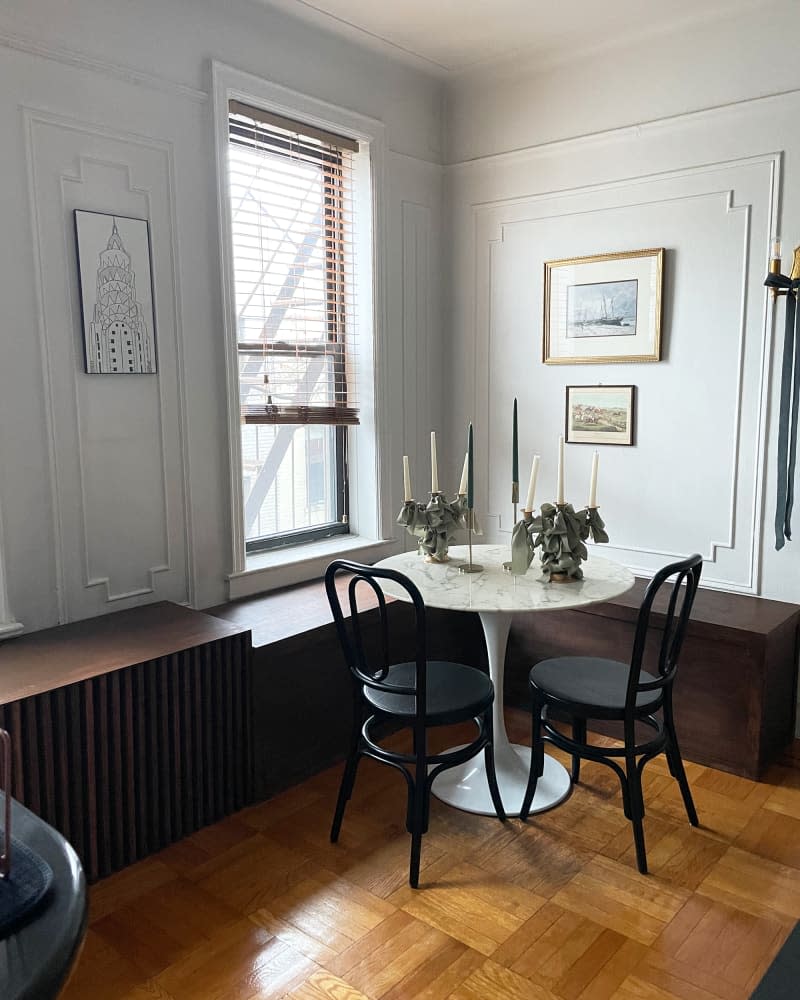
Once the bench itself was complete, Scalzi cut and stained 36 1×2-inch wood lengths, which she then installed on the front of the radiator to ventilate it, making sure to allow for proper airflow. After that, she used Minwax water-based stain in Pecan, a rich brown, on the remainder of the bench and the radiator cover. The last step of the process involved touching up the stain, lightly sanding everything with a 400-grit sanding block, and sealing everything with Minwax polyurethane.
All in all, Scalzi estimates building the bench set her back about $1,000, which includes the costs associated with purchasing a number of tools, including a nail gun. “Because this was our first time doing a woodworking project of this scale, we also over-bought on some of the wood,” she says. “Now, I have a number of scrap off-cuts to use for future projects.”
One of the biggest challenges Scalzi faced was the fact that her prewar apartment doesn’t have perfectly level floors. “The bench truly had to be custom built in-place to have the back, bottom, and sides be flush to the floor and walls,” she explains. That said, she thinks a DIYer with a fair amount of experience under their belt should be able to tackle a similar project.
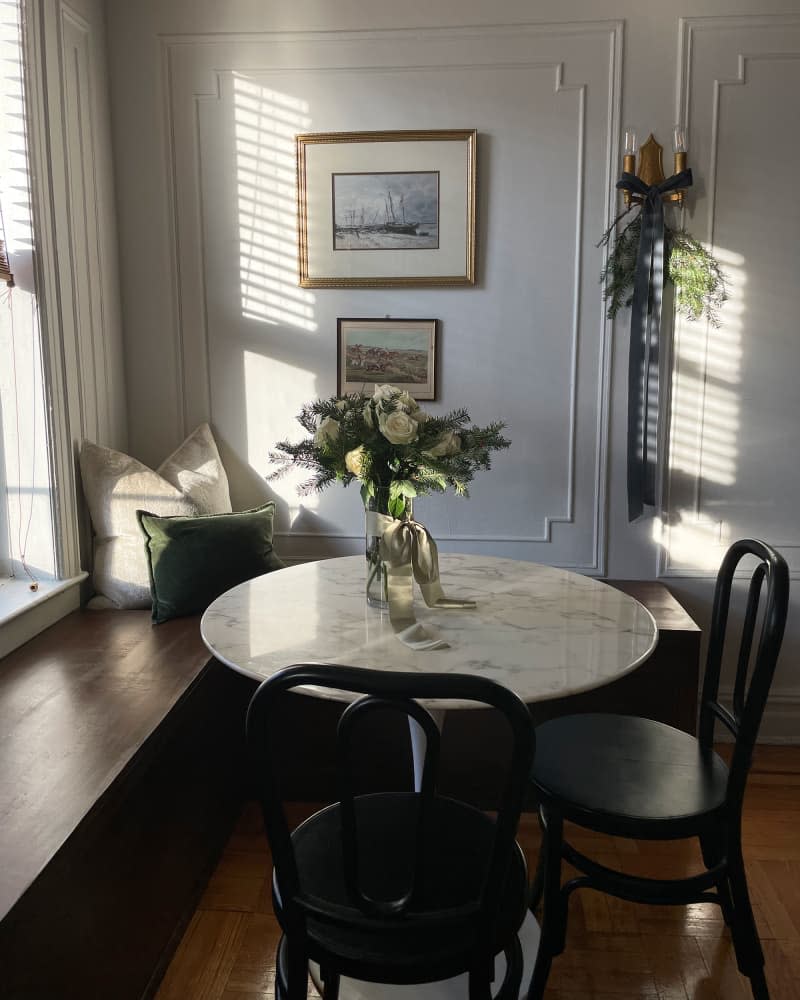
As a small-space dweller, Scalzi also appreciates that the finished bench is a multifunctional piece. “The bench gives us a ton of hidden storage space we didn’t have previously, which we are able to use for hiding non-perishable food, kitchen goods, and hobby-related items, like our tennis rackets,” she says. And the tulip-style dining table she pulled up to the bench? Well, that makes for the perfect dinner party table — or work-from-home desk!

