I Tried The Viral "Mousse Gel Mousse" Technique For My Waves, And OMG My Hair Has Never Looked This Good
I always thought my hair was an unmanageable frizz ball that required a straightener to be taken to it every night, but about four years ago I decided to ditch heat tools and embrace my wavy hair. After doing tons of research and spending way too much money, I thought I finally landed on a tried and true method for styling my hair. That was until a few months ago when it started losing definition and frizzing up ONCE AGAIN. So here I am back in my trial and error phase.

So, you can imagine my joy when I came across a video from Brittany aka @brittcurls on TikTok of her going through the mousse gel mousse styling method. For someone who wants gorgeous locks while still keeping things pretty low maintenance, this new technique seemed like my cup of tea.
@brittcurls I ❤️ mousse #curlyhair #curlyhairtutorial #curls #curlygirl #curly #curlyhairroutine #brittcurls #moussegelmousse
♬ original sound - brittcurls
@brittcurls / Via tiktok.com
In her video, Brittany explains how you can take your hair from "frizzy and fluffy" to defined curls with just two products and UNDER $10. Consider me sold. Well me and the other 8.7 million people that have viewed her video.

Brittany starts her styling process with soaking wet hair and rakes in her mousse. She adds "three golf balls" of mousse total and continuously flips her hair from side to side as she disperses the product.
Anyone else remember the days when we would put globs of mousse in our DRY hair and it would leave a stringy, crunchy mess?? I really hope this wasn't just me. I'm so glad we've evolved from that.
Next, she takes what I can only describe as a smidge of gel and uses her spray bottle to emulsify it with water. That then gets smoothed over her moussed-up hair.
This is called the "praying hands" technique where you simply apply the product to your hair using the palms of your hands rather than raking it in.
Brittany also makes sure to CONSTANTLY keep her hair soaking wet by having her spray bottle at the ready. Remember, we don't want stringy curls here, and soaking wet hair helps with clumping the curls together.

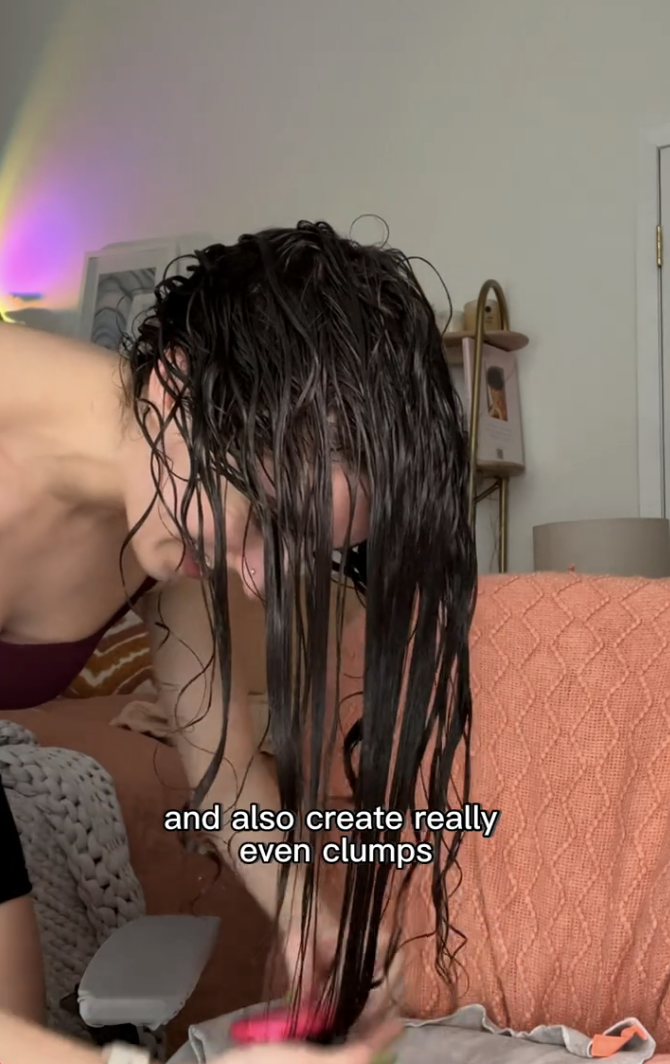
After applying the gel, Brittany flips her hair over and brushes it while explaining that this is "going to distribute all the product throughout my hair and also create really even clumps." She mentions that this step is optional, though.
Lastly, as the name suggests, Brittany smoothes more mousse over her hair before taking a little extra and scrunching it in. She ends by flipping her hair back and instructing that you can either air dry or diffuse your hair at this point — she opts for diffusing.

And just look at those results!

I mean, this is night and day. Despite using gel, Brittany describes her hair as being "soft and bouncy" after her routine. "Curly hair doesn't have to be something you do every single day," she says, "But if I can help you find a routine that you feel confident in, then I've done my job."
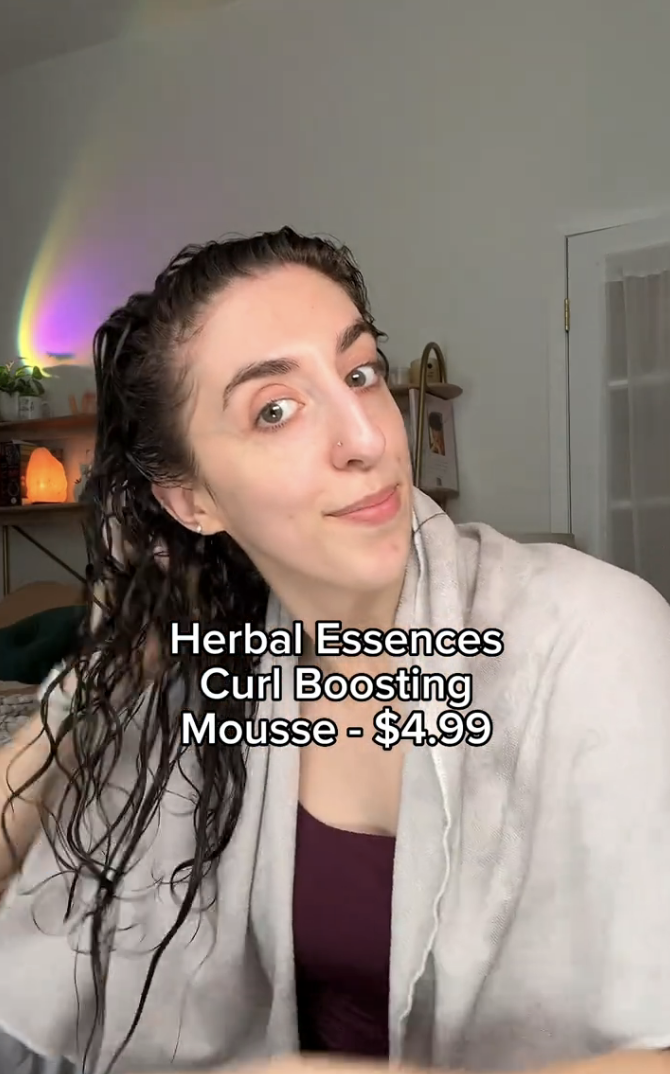
After repeatedly studying Brittany's technique, I decided to try it out for myself. I already use mousse in my usual hair routine but I typically pair it with a leave-in conditioner and curl cream. So all I needed to grab was the gel.

I'll admit, these products were definitely pricier than the ones in Brittany's video — the As I Am Curling Jelly was $15.99 and the Design Essentials Almond and Avocado Mousse was $16.99. But you obviously don't have to go this route. I've used both of these on their own before and know they work for my hair type, which is why I grabbed them.
First and foremost, I washed my hair just to get out any extra product buildup. I typically use any sulfate shampoo to do this followed by a hair mask that I'll leave in for about five minutes. If my hair is feeling suuuper dirty then I'll also throw in a scalp scrub before shampooing.
I used the Trader Joe's Tea Tree Tingle Shampoo ($3.99) and the Shea Moisture Jamaican Black Castor Oil Masque ($16.39) this time around. Also, I parted my hair because I cannot for the life of me figure out the whole "no part" look. Maybe one day.
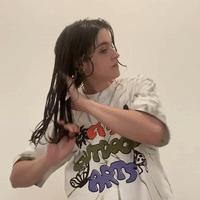
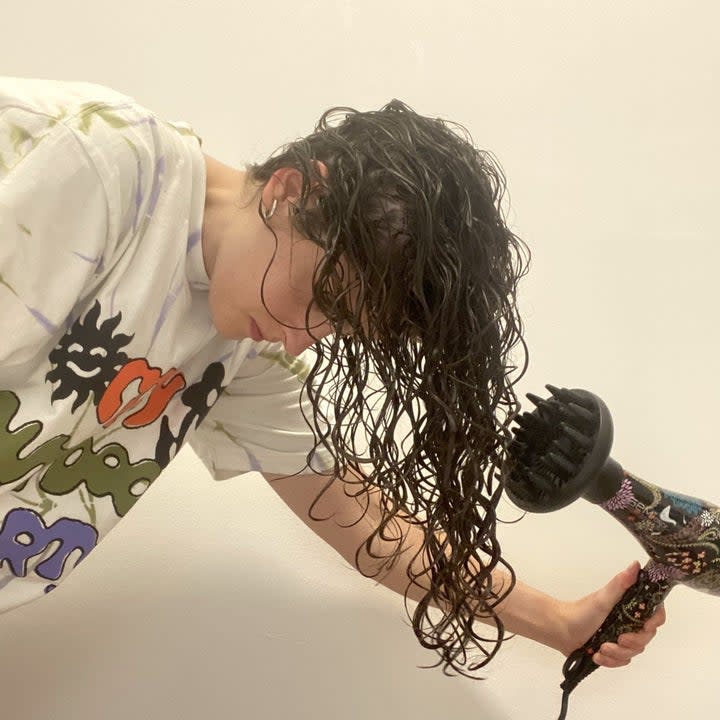
Now, onto the actual routine. I started by raking the mousse into my soaking wet hair right out of the shower.
Claudia Santos
I have to admit, I was a little nervous about "three golf balls" worth of mousse, especially since my hair can easily get weighed down. But for the sake of science, I proceeded. I flipped my hair from side to side while doing this, but I think this probably matters more if you're doing a "no part" look.
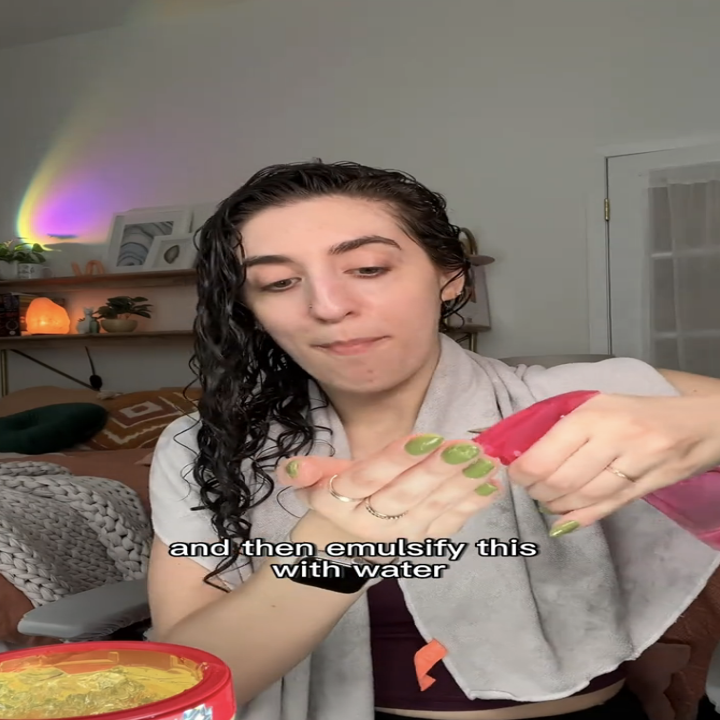
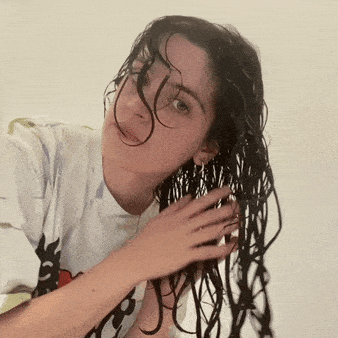
Then I grabbed maybe a dime-sized amount of gel plus a little water and rubbed my hands together. I definitely think I could've used more gel here, especially since mine has a pretty light hold. I smoothed that over my hair using the palms of my hands while also flipping from side to side.
Claudia Santos
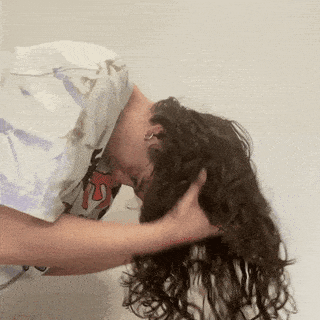
Now it's time to flip and brush. I know this part was optional, but I'll do anything for a good curl clump. I made sure to brush the hair directly in front of me away from my face, if that makes sense.
Claudia Santos
As in, I'm not brushing the hair at the nape of my neck forward. My hair doesn't usually do well with brushing upside down — I tend to get a lot of hair that wants to stick to the back of my scalp resulting in random straight pieces of hair when it's dry. But, again, for science. I also just used a regular ol' brush (rather than a styling brush) since it seemed like that's what Brittany was using.
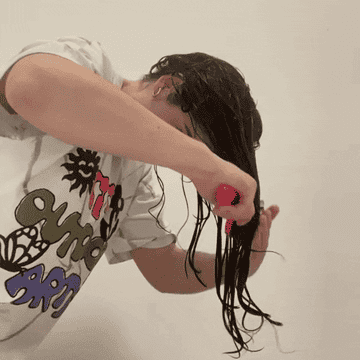
Lastly, I smoothed more mousse over my flipped hair and scrunched it with additional mousse. I probably used one golf ball size the first time then half of that the second time. I cannot emphasize how important scrunching is — just when you think you've done it enough, do it some more.
And make sure you scrunch all the way to the root for some good volume! I also flipped my hair from side to side to make sure I was getting those back pieces. I continued scrunching with a microfiber towel after this to squeeze out any extra product and moisture.
Okay, now time for the actual last step: diffusing. I started by hover diffusing — so I'm not actually touching my hair but just hovering my blow dryer around it. Then I "cupped" sections of my hair and held it for a few seconds.
I hover diffused for probably about 10 minutes or until I felt a decent "cast" forming from the gel and mousse, which basically just means my hair felt crunchy rather than wet. Once that cast was there, I cupped different sections until my hair was dry, which took about 20 minutes. Of course, this is all going to vary depending on your hair type, hair length, and the amount of product you use.
It's normal for your hair to feel really crunchy and stiff after this, but all you have to do is scrunch it out and shake your roots.
Claudia Santos
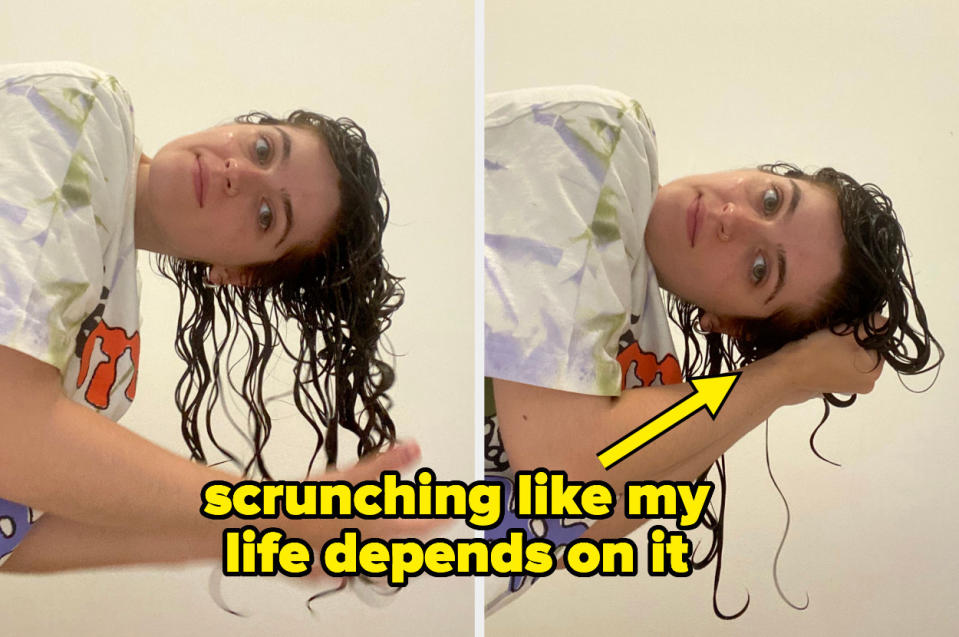
Once again, scrunch scrunch scrunch. As I mentioned, the gel and mousse leave a cast around your hair that needs to be scrunched out to make it soft. This isn't 2004, so DO NOT LEAVE THAT CAST IN. You'll know you've scrunched enough when your hair loses the crunchiness. It also helps if you use a little hair oil to do this.
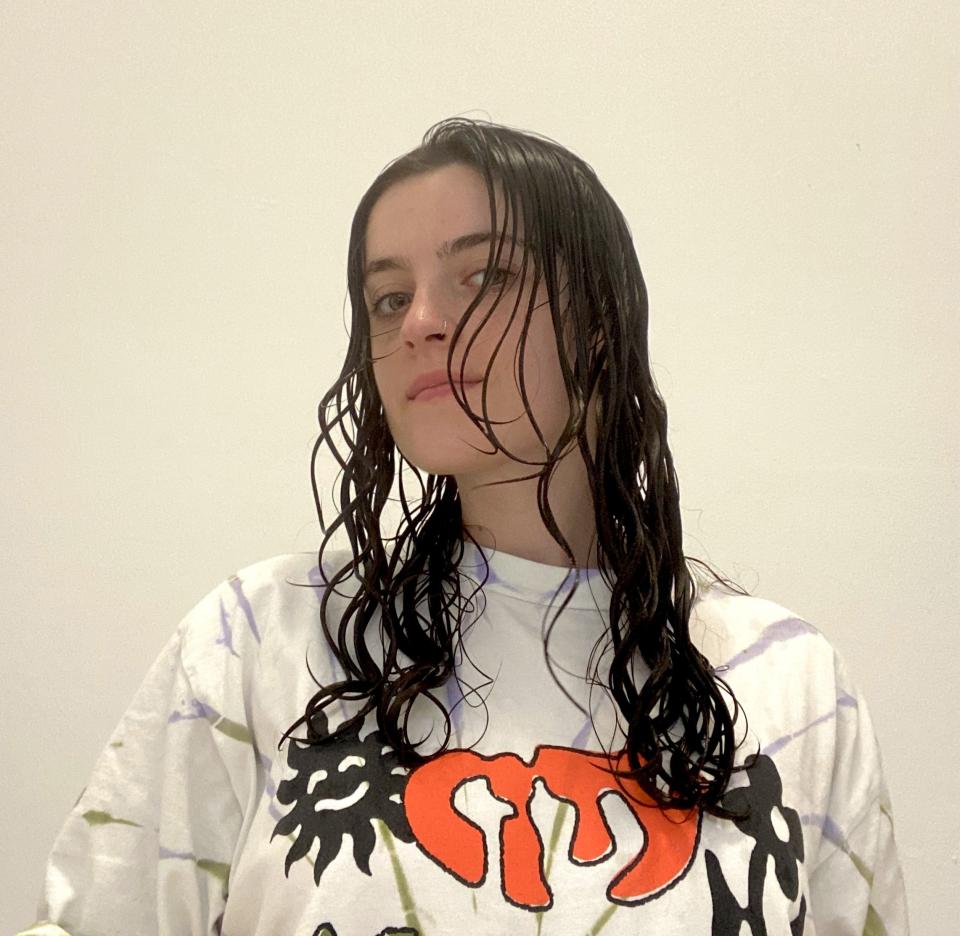
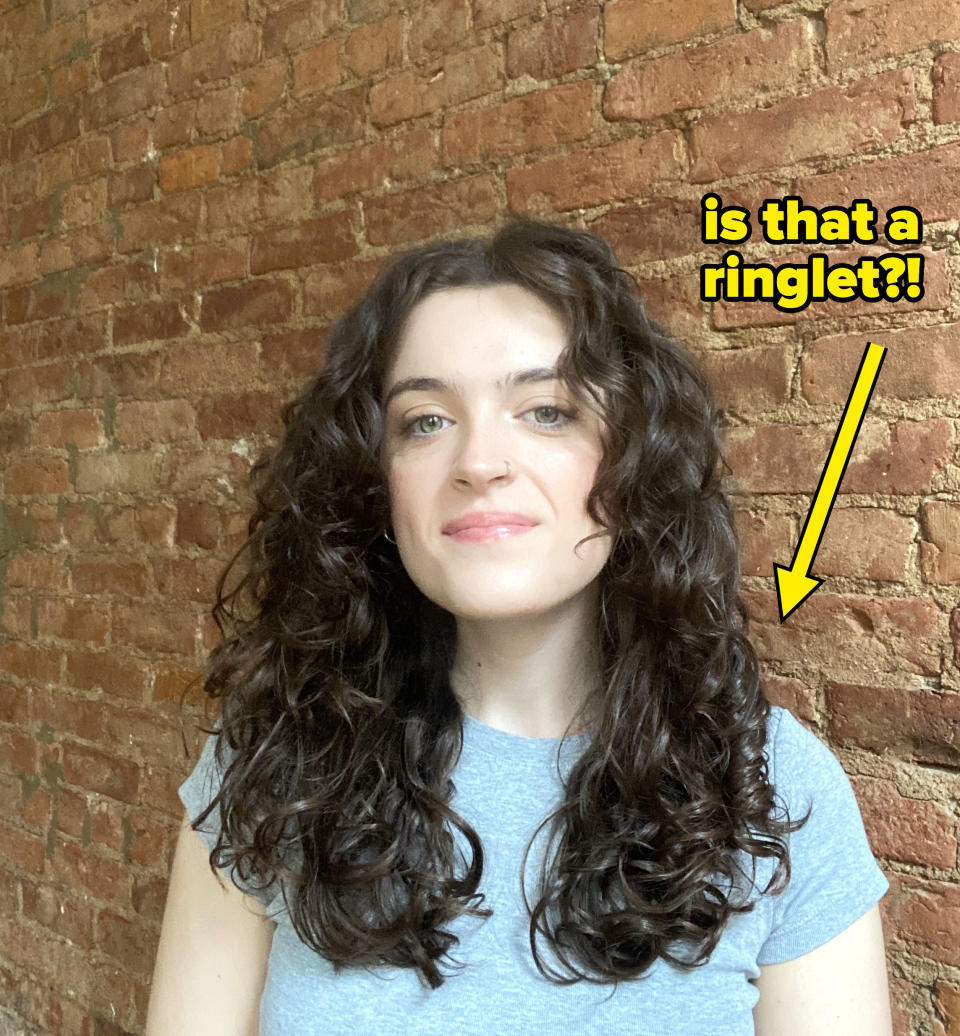
And y'all, when I tell you I haven't seen this kind of volume in my hair in AGES.
Claudia Santos
Umm, who even is she?! Honestly, I was kind of skeptical about using two hold products in my hair that could potentially weigh it down, but it literally had the opposite effect. Could my waves have been a little more defined? Sure. But if I really wanted to be little more high maintenance, I could brush style to solve that problem. I'm definitely a volume-over-definition kind of gal anyway.
Since I was filming/photographing everything, this routine of course took longer than it would normally, but I can't imagine it'll take more than five minutes next time I try it out. It probably seems like a lot of steps, but I definitely found this routine to be pretty low-maintenance.
Let's just take another look at the before and after:

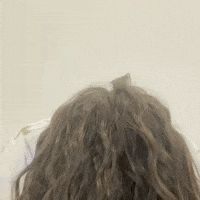
And if you're thinking, "Well there's no way that held up the next day," think again! This was my day two hair:
The volume died down but I think I might like it even more??
Overall, I found this method really easy to follow and was pleasantly surprised with the results — the volume in particular. I'd definitely recommend mousse gel mousse to anyone with wavy/curly hair, whether you're discovering your curls for the first time or just trying to change up your routine.
Thanks to @brittcurls for sharing her routine and helping me achieve some wild volume in my hair! Feel free to follow her for all things curly hair.

